Créer un groupe
Créé il y a 2 mois
Depuis votre compte, allez dans l'onglet Groupes puis appuyez sur Créer un groupe en haut à droite sur la version web ou Créer un groupe dans l'onglet Les miens sur iOS et Android. Sur la version web, une fenêtre s'ouvre vous proposant de choisir parmi les différentes offres pour les particuliers ou professionnels. Sur iOS ou Android, vous pouvez seulement créer des groupes avec l'offre Simple.
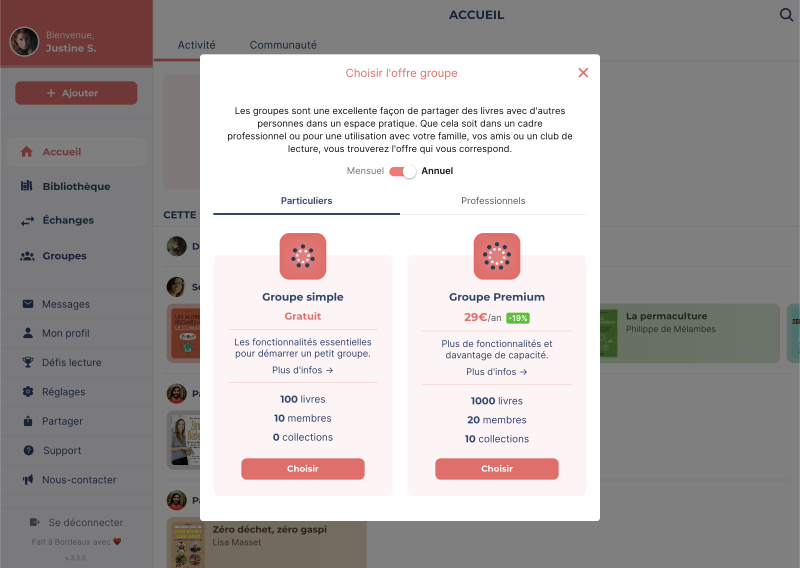
Pour les particuliers :
- Groupe simple (gratuit)
- Groupe Premium
Pour les professionnels :
- Groupe Premium Pro
- Groupe Premium Pro L
Consultez le détail des offres pour plus d'informations.
Sur l'offre correspondant à vos besoins, appuyez sur Choisir. À savoir que sur iOS et Android vous pouvez seulement créer des groupes avec l'offre Simple. Une fois votre choix effectué, rentrez les informations de votre groupe. Voici les champs à remplir :
- Image : choisissez une image pour votre groupe, cela peut être votre logo ou une image représentative de votre groupe.
- Nom : saisissez un nom pour votre groupe.
- Description : décrivez votre groupe pour que les autres utilisateur·rice·s sachent de quoi il s'agit.
- Lieu : indiquez votre localisation, ce qui est utile pour prêter ou emprunter des livres papier.
- Type d'usage : choisissez le type d'usage de votre groupe, par exemple : particulier, professionnel, etc.
- Site web : indiquez l'URL de votre site web, si vous en avez un.
- Groupe public : indiquez si votre groupe est public ou privé.
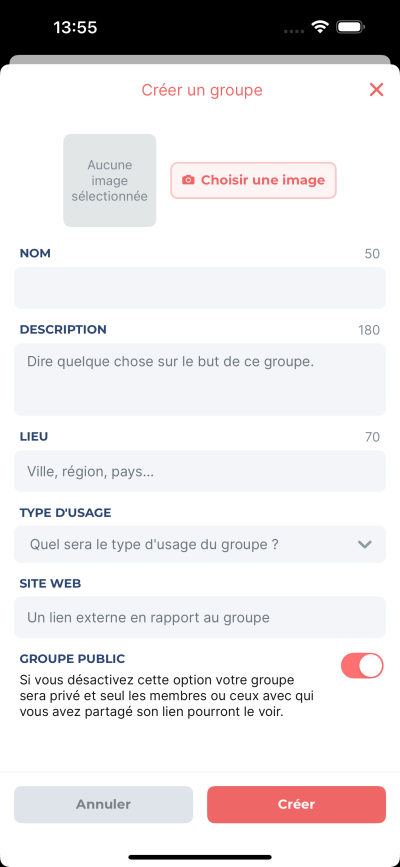
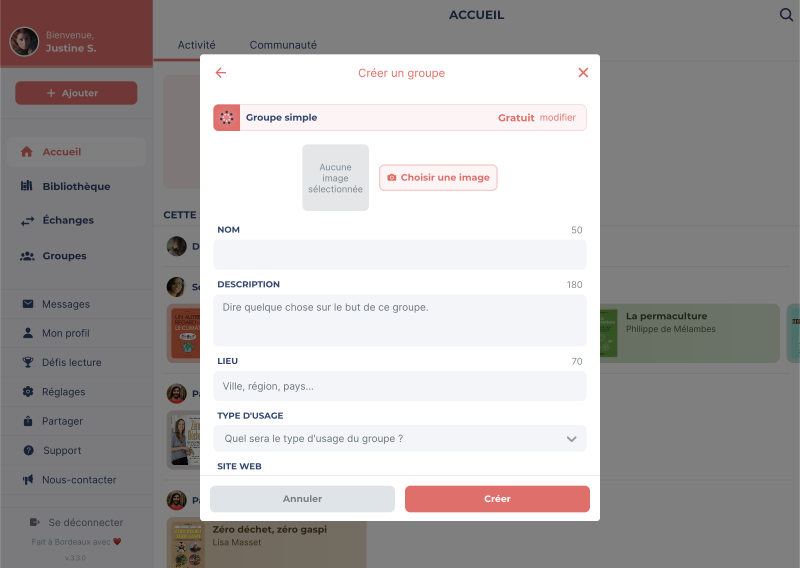
Une fois les informations saisies, appuyez sur Créer pour finaliser la création de votre groupe. Si vous avez opté pour un groupe Premium alors vous passerez à l'étape du paiement. Le groupe que vous venez de créer sera visible dans l'onglet Groupes puis Les Miens.
📝 Note : pour créer un groupe vous devez d'abord être inscrit·e sur MyBlio. Si vous n'avez pas encore utilisé l'application nous vous invitons à consulter le guide de démarrage.